
In previous installments of this series we built out a fully functional plugin dedicated to tracking Bgp Peering connections. In this post we'll add final components: object permissions and API views.
Developing NetBox Plugin tutorial series
- Developing NetBox Plugin - Part 1 - Setup and initial build
- Developing NetBox Plugin - Part 2 - Adding web UI pages
- Developing NetBox Plugin - Part 3 - Adding search panel
- Developing NetBox Plugin - Part 4 - Small improvements
- Developing NetBox Plugin - Part 5 - Permissions and API
Contents
Adding permissions
Right now all users can view, edit and delete Bgp Peering objects. In the production system we would like to be able to have more granular control over who can perform a given operation. This is where the permissions system comes in.
In our plugin we will leverage Django authentication system [1] to enable permissions for views we built out.
Adding permissions to views
Below are the changes I made to views.py to add permission handling to each of the views:
# views.py
from django.contrib.auth.mixins import PermissionRequiredMixin

...

class BgpPeeringView(PermissionRequiredMixin, View):
    """Display BGP Peering details"""

    permission_required = "netbox_bgppeering.view_bgppeering"
    ...

class BgpPeeringListView(PermissionRequiredMixin, View):
    """View for listing all existing BGP Peerings."""

    permission_required = "netbox_bgppeering.view_bgppeering"
    ...

class BgpPeeringCreateView(PermissionRequiredMixin, CreateView):
    """View for creating a new BgpPeering instance."""

    permission_required = "netbox_bgppeering.add_bgppeering"
    ...

class BgpPeeringDeleteView(PermissionRequiredMixin, DeleteView):
    """View for deleting a BgpPeering instance."""

    permission_required = "netbox_bgppeering.delete_bgppeering"
    ...

class BgpPeeringEditView(PermissionRequiredMixin, UpdateView):
    """View for editing a BgpPeering instance."""

    permission_required = "netbox_bgppeering.change_bgppeering"
    ...
I've only included bits that have changed. Below is quick breakdown of what we did:
-
We import
PermissionRequiredMixinmixin class fromdjango.contrib.auth.mixins. This class will handle permission checks logic and will plug into the NetBox's existing authorization system. -
For each view class we add
PermissionRequiredMixinto classes we subclass from. E.g.
class BgpPeeringCreateView(PermissionRequiredMixin, CreateView)
- In each of the classes we enabled for permission checks we need to specify permission, or iterable of permissions, required to access the view. To do that we use parameter
permission_required. E.g.
class BgpPeeringDeleteView(PermissionRequiredMixin, DeleteView):
    """View for deleting a BgpPeering instance."""

    permission_required = "netbox_bgppeering.delete_bgppeering"
Permission names follow the following naming convention:
<app_name>.{view|add|delete|change}_<model_name>
Example permission names:
-
Allow displaying BgpPeering instance:
netbox_bgppeering.view_bgppeering. -
Allow deleting BgpPeering instance:
netbox_bgppeering.delete_bgppeering. -
Allow modifying BgpPeering instance:
netbox_bgppeering.change_bgppeering.
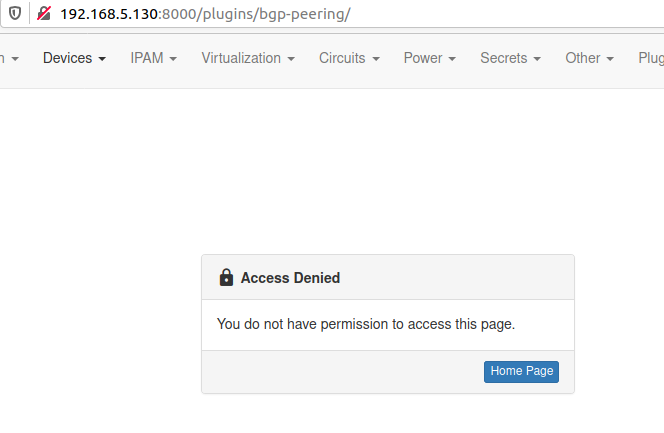
After reloading NetBox try logging in as a non-privileged user and accessing BgpPeering plugin. You should get Access Denied message, like the one below:
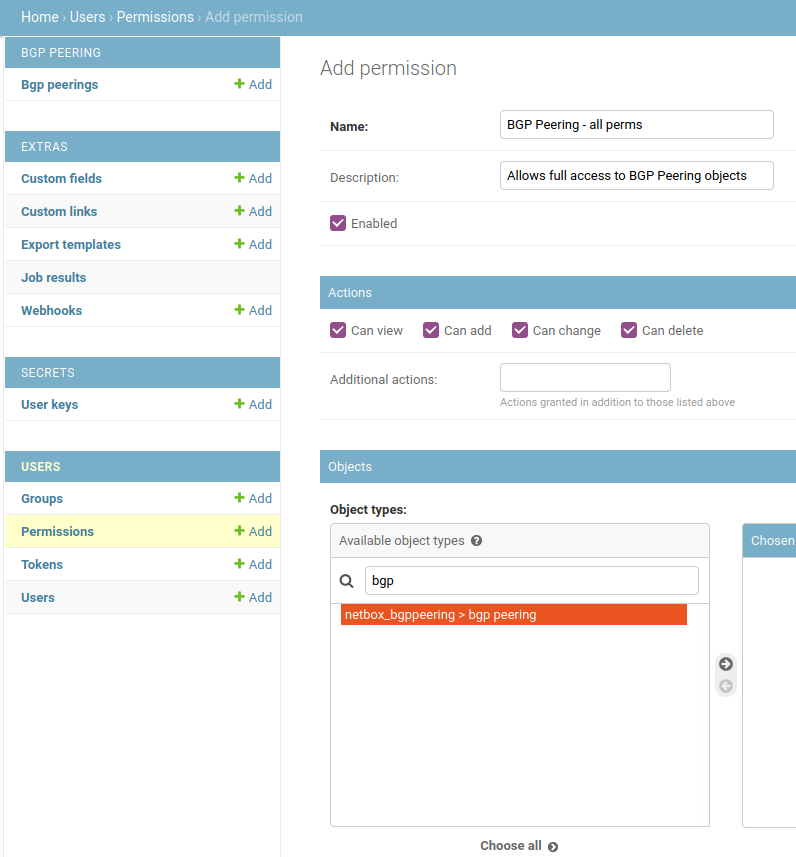
You can now switch to admin user and log into admin panel. In the admin panel if you add new permissions in User > Permissions, you should see that netbox_bgppeering > bgp peering permission now appears on the list of available object types.
Adding permissions to Web GUI elements
We now have in place permissions that control the ability to view, add, delete, and edit Bgp Peering objects. But Web GUI elements, like the edit button, will still be shown to all users. Time to change that and make this behaviour permission dependent.
- First we set permission required to see plus,
+, button in the top plugin menu. We editnavigation.py:
# navigation.py
...
menu_items = (
    PluginMenuItem(
        ...
        buttons=(
            PluginMenuButton(
                ...
                permissions=["netbox_bgppeering.add_bgppeering"],
            ),
There's only one addition. We pass a new parameter, permissions, when creating a PluginMenuButton object. We set its value to an iterable of permissions, in our case it's just one permission: netbox_bgppeering.add_bgppeering.
After this is done only users who have Can add permission on BgpPeering objects will be able to see the + button.
- The final changes are to the templates that show
BgpPeeringrelated buttons. In our case those arebgppeering.htmlandbgppeering_list.html.
<!-- bgppeering.html -->
...
<div class="col-sm-8">
    <div class="pull-right noprint">
        {% if perms.netbox_bgppeering.change_bgppeering %}
        <a href="{% url 'plugins:netbox_bgppeering:bgppeering_edit' pk=bgppeering.pk %}" class="btn btn-warning">
            <span class="{{ icon_classes.pencil }}" aria-hidden="true"></span> Edit
        </a>
        {% endif %}
        {% if perms.netbox_bgppeering.delete_bgppeering %}
        <a href="{% url 'plugins:netbox_bgppeering:bgppeering_delete' pk=bgppeering.pk %}" class="btn btn-danger">
            <span class="{{ icon_classes.trash }}" aria-hidden="true"></span> Delete
        </a>
        {% endif %}
    </div>
</div>
...
<!-- bgppeering_list.html -->
...
<div class="pull-right noprint">
    {% if perms.netbox_bgppeering.add_bgppeering %}
    <a href="{% url 'plugins:netbox_bgppeering:bgppeering_add' %}" class="btn btn-primary">
        <span class="{{ icon_classes.plus }}" aria-hidden="true"></span> Add
    </a>
    {% endif %}
</div>
...
To check permission is set before including the element we use {% if perms.<permission_name> %} conditional.
In our case we have the below conditionals:
{% if perms.netbox_bgppeering.change_bgppeering %}to includeEditbutton.{% if perms.netbox_bgppeering.delete_bgppeering %}to includeDeletebutton.{% if perms.netbox_bgppeering.bgppeering_add %}to includeAddbutton.
If the user doesn't have one of those permissions then the corresponding button will not show in Web GUI.
And that's it. With changes to the views and Web GUI elements we have implemented a permissions system for our plugin.
Next stop, API!
Source code up to this point is in branch adding-permission if you want to check it out: https://github.com/progala/ttl255-netbox-plugin-bgppeering/tree/adding-permissions.
Adding API
Being able to interact with BgpPeering objects in Web GUI is great and useful but it's not well suited to automation. If we want to programmatically interact with our plugin we need to expose it via API. And that's what we're going to do now.
To add code handling API we need to create a new directory called api. This is where source code files related to API functionality need to go.
In case of our plugin the path that includes api directory looks like so:
../ttl255-netbox-plugin-bgppeering/netbox_bgppeering/api
In this directory we will create three source code files, serializers.py, urls.py and views.py:
├── api
│   ├── serializers.py
│   ├── urls.py
│   └── views.py
With that out of the way, let's start coding!
Building serializer for BgpPeering objects
First thing we need to do is to specify how BgpPeering model instances will be rendered into json representation.
For that purpose we will use Django REST framework [2] as well as existing NetBox serializers.
Our serializers go into the api/serializers.py file, and below is the serializer I wrote for the BgpPeering model.
# api/serializers.py

from rest_framework import serializers

from ipam.api.nested_serializers import (
    NestedIPAddressSerializer,
)
from dcim.api.nested_serializers import NestedDeviceSerializer, NestedSiteSerializer

from netbox_bgppeering.models import BgpPeering


class BgpPeeringSerializer(serializers.ModelSerializer):
    """Serializer for the BgpPeering model."""

    site = NestedSiteSerializer(
        many=False,
        read_only=False,
        required=False,
        help_text="BgpPeering Site",
    )

    device = NestedDeviceSerializer(
        many=False,
        read_only=False,
        required=True,
        help_text="BgpPeering Device",
    )

    local_ip = NestedIPAddressSerializer(
        many=False,
        read_only=False,
        required=True,
        help_text="Local peering IP",
    )

    class Meta:
        model = BgpPeering
        fields = [
            "id",
            "site",
            "device",
            "local_ip",
            "local_as",
            "remote_ip",
            "remote_as",
            "peer_name",
            "description",
        ]
Few new concepts appear here so let's dig into this code.
-
from rest_framework import serializers- We import moduleserializerswhich contains base serializer class we will use. -
Next we import nested serializers [3] for NetBox objects that we link to in our model. This will allow us to:
- Return
jsonrepresentation of those objects nested inside of BgpPeering data structure. - Use of
name,slug, etc., fields for linked objects in POST/PATCH/PUT requests. Otherwise we'd only be allowed to passidfor these.
- Return
 from ipam.api.nested_serializers import (
    NestedIPAddressSerializer,
)
from dcim.api.nested_serializers import NestedDeviceSerializer, NestedSiteSerializer
- Final import is the model that we're building a serializer for:
from netbox_bgppeering.models import BgpPeering.
With imports out of the way we can build the serializer class.
-
BgpPeeringSerializer(serializers.ModelSerializer)- I named our classBgpPeeringSerializerand I'm subclassingModelSerializerclass. That class will automatically handle serializing of most of the fields in our model, among other things. -
In internal class
Metawe specify a model that is being serialized, hereBgpPeering. Then we specify a list of fields that we want to be included when serialization takes place. Fields that don't require special treatment will be automatically rendered thanks to theBgpPeeringSerializerclass.
    class Meta:
        model = BgpPeering
        fields = [
            "id",
            "site",
            "device",
            "local_ip",
            "local_as",
            "remote_ip",
            "remote_as",
            "peer_name",
            "description",
        ]
- Finally, I'm telling the serializer class that three of the model fields need to be treated differently. Namely I want linked models to be also serialized and included in the
jsonpayload returned in the API response.
This is not required but in a lot of cases it makes sense to return these data structures nested inside of the main structure. It will help us avoid multiple API calls that would be otherwise needed to retrieve details of linked objects.
It also simplifies adding/modifying objects via API, as already mentioned.
For each of the fields that need to contain nested data we must:
- Identify the nested serializer matching model this field links to.
- Instantiate the class and assign the resulting object to the parameter named after the field.
For example below is the nested serializer we use for site field:
    site = NestedSiteSerializer(
        many=False,
        read_only=False,
        required=False,
        help_text="BgpPeering Site",
    )
When creating NestedSiteSerializer object we need to provide a few arguments [4]:
many- set it to match the relationship type set on the field in the model. We don't have any many-to-many relationships so in our casemanyis set toFalse.read_only- set it toTrueif you want the field to be read-only and not allowed as the input in API calls. In our case all custom fields can be used as input so we set it toFalse.required- specifies whether field is required. This should follow the corresponding property we set for the model field.help_text- used to give this field description that is picked up when rendering the field.
And that's it, our serializer is completed.
Building API views
With the serializer taken care of we move onto API view. This view goes into the api/views.py file and it will handle all of the different HTTP API calls.
# api/views.py

from rest_framework import mixins, viewsets

from netbox_bgppeering.models import BgpPeering
from netbox_bgppeering.filters import BgpPeeringFilter

from .serializers import BgpPeeringSerializer


class BgpPeeringView(
    mixins.CreateModelMixin,
    mixins.DestroyModelMixin,
    mixins.ListModelMixin,
    mixins.RetrieveModelMixin,
    mixins.UpdateModelMixin,
    viewsets.GenericViewSet,
):
    """Create, check status of, update, and delete BgpPeering object."""

    queryset = BgpPeering.objects.all()
    filterset_class = BgpPeeringFilter
    serializer_class = BgpPeeringSerializer
Not too much code but some new concepts, let's break it down:
viewsets.GenericViewSet- This is aViewSet[5] class that lets us combine multiple different views into one view. Normally we would have to build separate views for adding, editing, deleting, etc. objects. We then would need to separately add each of these to URL conf. WithViewSetwe need just one view and we will only need one entry in URL conf.
Next, we subclass a number of mixin classes implementing different actions that will allow us to support HTTP request methods.
mixins.CreateModelMixin- This class takes care of creating and saving a new model instance. Responds to HTTP POST.mixins.DestroyModelMixin- This class will handle deletion of model instances. Responds to HTTP DELETE.mixins.ListModelMixin- This class allows returning a list of instances in API response. Used with HTTP GET.mixins.RetrieveModelMixin- This class handles retrieval of a single model instance. Used with HTTP GET.mixins.UpdateModelMixin- Finally, this class enables edits, both merge and replace. Used with HTTP PUT and PATCH.
In the body of the class we have three attributes:
-
queryset- This is like in a normal view, we specify BgpPeering objects that are of interest. Here we want all objects to be up for grabs in API calls:queryset = BgpPeering.objects.all() -
filterset_class- This specifies a filter class that can be used to apply search queries when retrieving objects via API. We're re-usingBgpPeeringFilterwhich we built for the Search Panel. This means we can filter objects through API using the same queries we used in Web GUI.filterset_class = BgpPeeringFilterFor example, if we wanted to get Bgp Peering objects that have string
primaryin description we could use general query parameterq:http://localhost:8000/api/plugins/bgp-peering/bgppeering/?q=primary -
serializer_class- Finally we have a serializer class that we just built. This will be used to render our model intojsonrepresentation.serializer_class = BgpPeeringSerializer
Defining URL for API calls
With serializer and view classes in place we just need to tie it together and expose API endpoints via URL. Code for that goes into the api/urls.py file.
# api/urls.py
from rest_framework import routers
from .views import BgpPeeringView

router = routers.DefaultRouter()

router.register(r"bgppeering", BgpPeeringView)

urlpatterns = router.urls
This is slightly different to urls.py for Web GUI views. Here we use the router class DefaultRouter [6] which comes from Django REST Framework. This will automatically handle requests to API URLs exposed by API using different HTTP methods.
What this means is that we don't have to manually create multiple URL rules. Thanks to DefaultRouter we need only one:
router.register(r"bgppeering", BgpPeeringView)
That's it. This one URL rule will handle GET, POST, etc. requests automatically.
Finally, we assign urls auto-generated by router class to urlpatterns variable. This variable is what Django uses for path mappings.
urlpatterns = router.urls
And we're done! With URLs in place we can take our API for a spin!
API usage examples
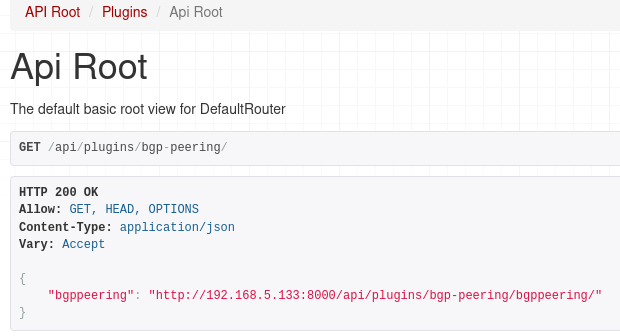
If you now navigate to the main API URL for our plugin, http://localhost:8000/api/plugins/bgp-peering/, you should see the available endpoint.
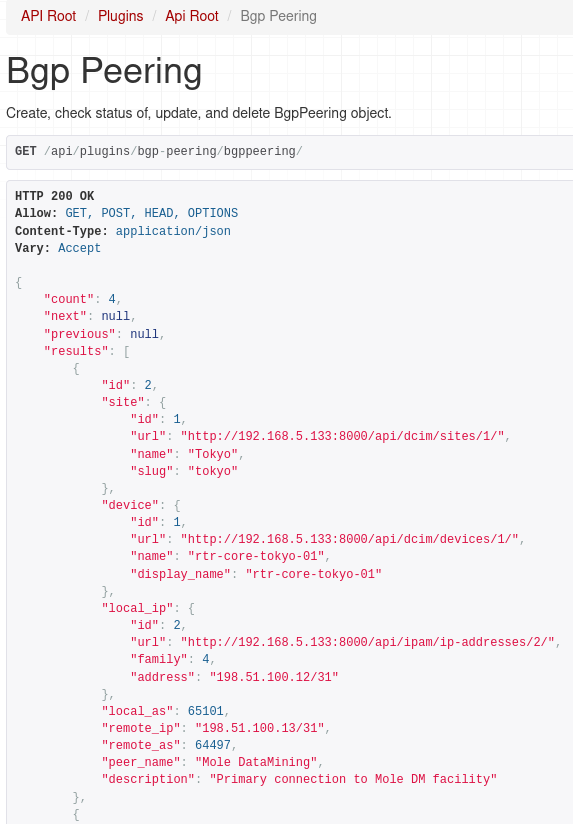
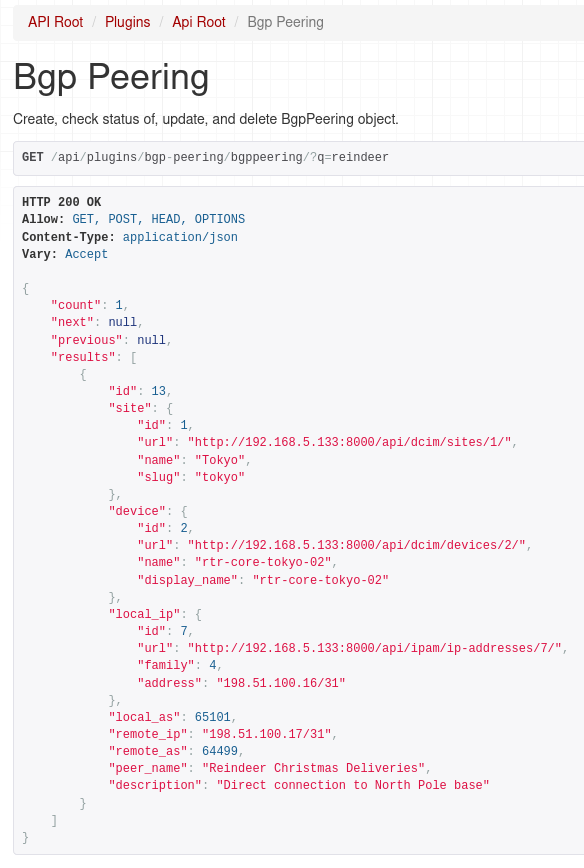
If we followed the URL for our endpoint we should get json reply with list of Bgp Peerings:
And as I mentioned earlier we can use filtering as well, here we ask for peerings that have 'reindeer' string in the peer name or description.
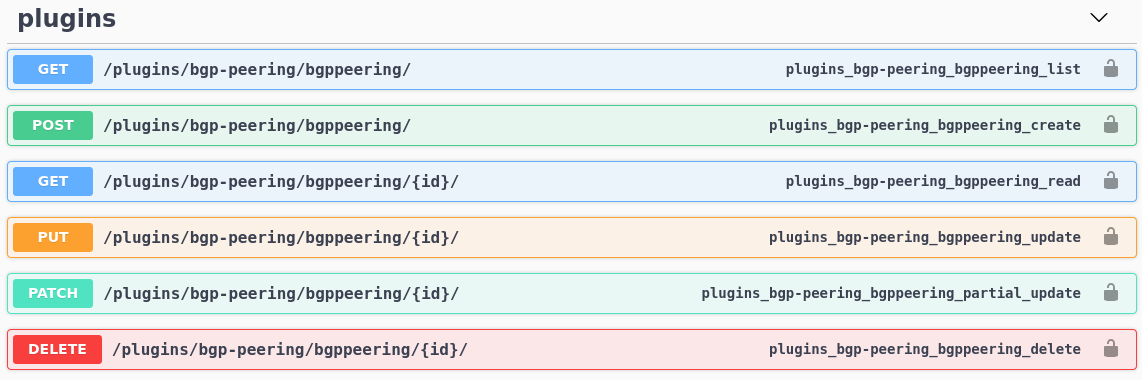
What's nice is that documentation for our API now shows up in Swagger docs:
So we can view objects, but can we add or modify them?
Let's try out other HTTP methods using Postman.
POST:
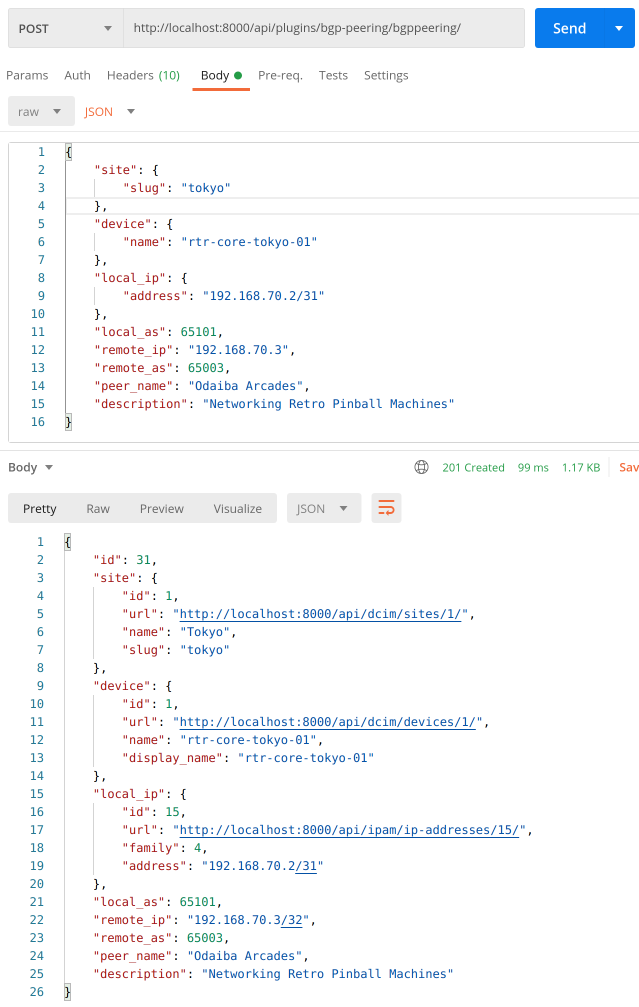
Here we're adding a new object, notice nested payload values for site, device and IP address. If we didn't define nested serializers for these models we'd have to provide id of the objects we're linking to. This will make it much easier to consume our API for Bgp Peering plugin.
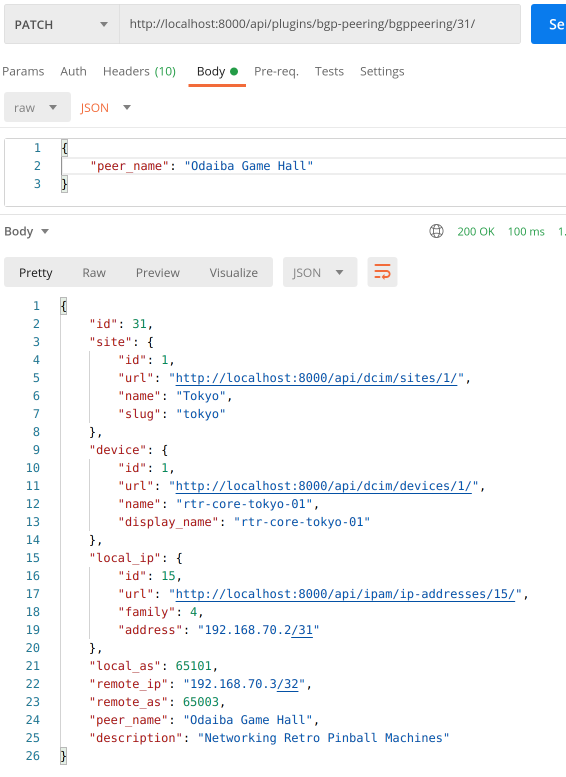
For completeness we'll try out PATCH and DELETE methods as well:
PATCH:
DELETE:
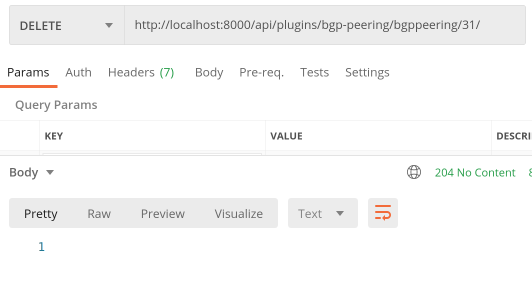
Awesome, everything is working as expected!
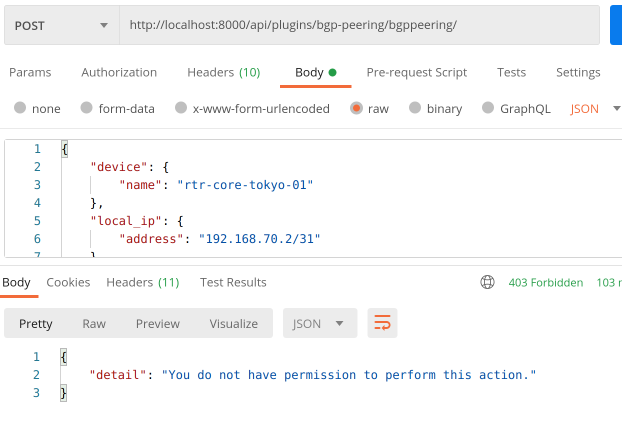
In case you were wondering, permissions we implemented in the first part of this post are automatically applied to API views.
This is what happens when user that has read-only access to Bgp Peering objects tries to create a new one:
Conclusion
And with that we came to the end of the tutorial walking you through the development of an example NetBox plugin. During our journey we built a functional plugin that implements a custom model representing Bgp Peering record. We built Web GUI views allowing users to view, add, edit and delete objects. Next we implemented object filtering before adding permissions and API.
There's much more we could do here. We could add export/import functionality. Perhaps improving data validation and search would be a welcome addition. But I believe that what you learned here should give you a solid base that you can build on top of. Everything else is up to your imagination.Happy coding!
Resources
- NetBox docs: Plugin Development: https://netbox.readthedocs.io/en/stable/plugins/development/
- NetBox source code on GitHub: https://github.com/netbox-community/netbox
- NetBox Extensibility Overview, NetBox Day 2020: https://www.youtube.com/watch?v=FSoCzuWOAE0
- NetBox Plugins Development, NetBox Day 2020: https://www.youtube.com/watch?v=LUCUBPrTtJ4
Django authentication system: https://docs.djangoproject.com/en/3.1/topics/auth/default/ ↩︎
Django REST framework: https://www.django-rest-framework.org/ ↩︎
Django REST nested relationships: https://www.django-rest-framework.org/api-guide/relations/#nested-relationships ↩︎
Django REST serializer arguments: https://www.django-rest-framework.org/api-guide/fields/#core-arguments ↩︎
Django REST ViewSets: https://www.django-rest-framework.org/api-guide/viewsets/ ↩︎
Django REST DefaultRouter: https://www.django-rest-framework.org/api-guide/routers/#defaultrouter ↩︎